Master the Art of Graduation Cookies for Sweet Success
Master the Art of Graduation Cookies: 5 Steps to Sweet Success! This recipe not only celebrates your graduate’s achievements but also saves you time in the kitchen with its straightforward instructions. Have you ever wondered how to create cookies that are both visually stunning and incredibly tasty for your special occasion? Imagine the sweet aroma of freshly baked cookies wafting through your kitchen, the vibrant colors of icing catching your eye, and the delightful crunch as you take your first bite.
As you gather around the table with family and friends, these cookies will be the highlight of your graduation celebration. With their tender texture and the perfect balance of sweetness, they are sure to impress everyone. The colorful decorations will add a festive touch, making these cookies the centerpiece of your dessert table. The moment you decorate these cookies, you will feel a sense of accomplishment knowing you made something special for this significant milestone.
Graduation cookies are not just treats; they carry emotional value, symbolizing years of hard work and dedication. They provide an opportunity to express your creativity, whether you opt for traditional graduation caps or personalized messages. Each cookie you create can tell a story, showcasing your graduate’s journey and achievements. Moreover, these cookies are versatile and can be customized to match your graduate’s school colors or personal style. The combination of flavors and the joy of baking together make this an activity that everyone will cherish.
When it comes to the health benefits of baking with quality ingredients, consider the following: All-purpose flour provides essential carbohydrates for energy, making it a staple in your baking. Unsalted butter adds richness and flavor, and while it contains fat, it can also provide vitamins A, D, E, and K. The addition of vanilla extract not only enhances the flavor but also contains antioxidants, promoting overall health. Interestingly, meringue powder can stabilize your icing, making it easier to decorate and achieving that professional finish you desire.
Moreover, using fresh ingredients ensures that your cookies taste better and contain more nutrients. Baking can also be a stress-relieving activity, allowing you to focus on the present moment while creating something beautiful. The act of decorating cookies can be a form of mindfulness, helping you unwind as you pipe icing and sprinkle edible decorations. Overall, the health benefits of these ingredients, combined with the joy of baking, make this recipe worthwhile.
What makes this graduation cookie recipe stand out is its simplicity and adaptability. While traditional recipes can be overly complex, this version focuses on ease, making it perfect for beginners and experienced bakers alike. The step-by-step guide breaks down the process into manageable tasks, allowing you to enjoy the experience without feeling overwhelmed. You can involve your family in the decorating process, creating lasting memories together as you celebrate your graduate’s success.
This recipe has gained popularity not just for its taste but also for its visual appeal. It works wonderfully for families looking to create something special for their loved ones. The vibrant colors and customizable nature of the cookies make them suitable for various occasions beyond graduation, such as birthday parties, holiday celebrations, or any event where you want to add a personal touch. Additionally, the cookies can be made ahead of time, making them ideal for meal prep or last-minute gatherings.
In summary, this recipe takes about 30 minutes to prepare, with a baking time of 10-12 minutes, yielding around 24 cookies. It is suitable for beginners, and it’s perfect for weeknight baking or special occasions. Now that you’re excited to start baking, let’s get into the specifics!
What is Graduation Cookies?
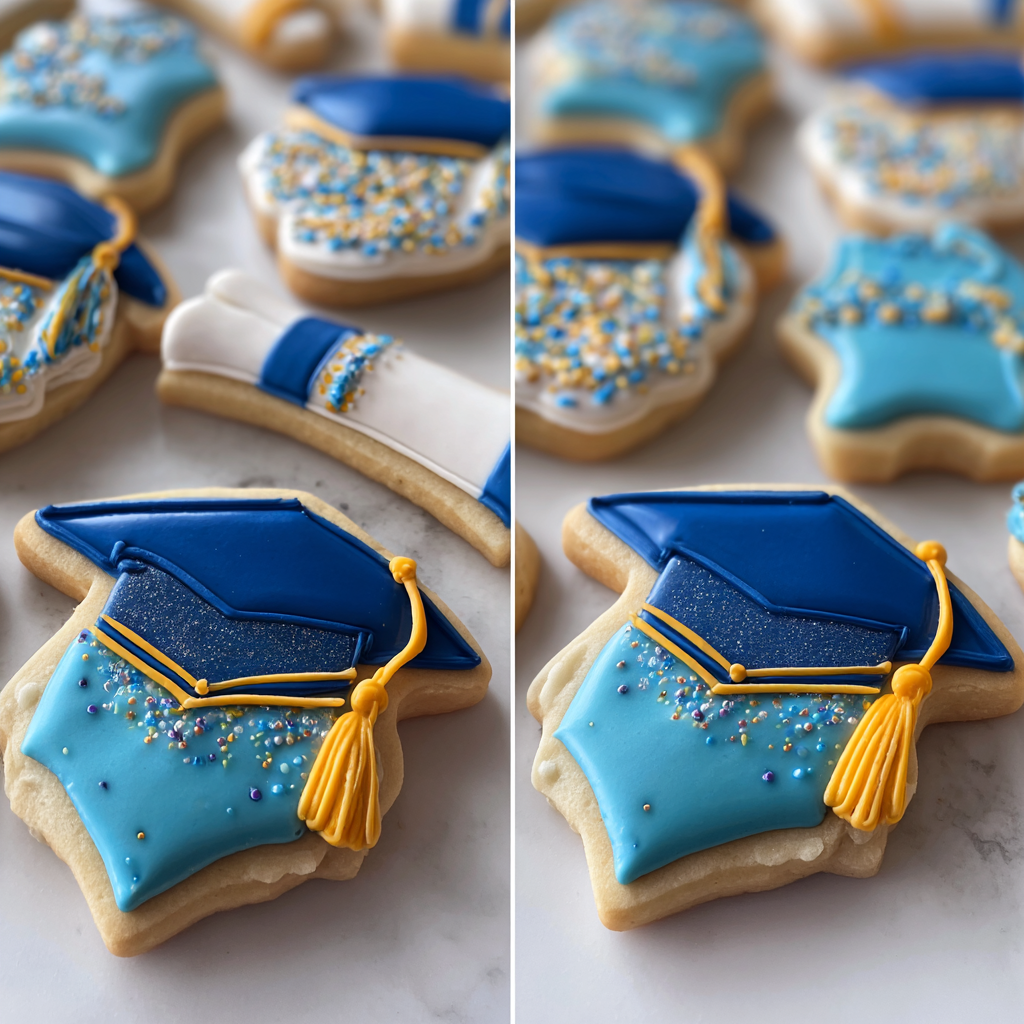
Graduation cookies are specially designed treats that celebrate the accomplishment of graduating. They are typically decorated to resemble graduation caps, diplomas, or the graduate’s school colors. These cookies are often sugar cookies, which are soft and can be easily decorated with icing, making them perfect for such a festive occasion.
Why You Will Love This Recipe
- Simple step-by-step instructions make it easy for anyone to create beautiful cookies.
- Customizable designs allow you to personalize cookies for each graduate.
- Perfect for gatherings, as they are visually appealing and delicious.
- Use of quality ingredients ensures great taste and texture.
- Ideal for bonding with family as you decorate together.
Ingredients You Need
- 2 3/4 cups all-purpose flour: The base of the cookies, providing structure and texture.
- 1 teaspoon baking soda: Helps the cookies rise and achieve a light texture.
- 1/2 teaspoon baking powder: Adds extra lift and lightness to the cookies.
- 1 cup unsalted butter, softened: Adds richness and flavor, ensuring a tender cookie.
- 1 1/2 cups white sugar: Sweetens the cookies, balancing the flavors.
- 1 egg: Binds the ingredients together and adds moisture.
- 1 teaspoon vanilla extract: Enhances the flavor profile with a warm aroma.
- 1/2 teaspoon almond extract: Adds a subtle nutty flavor that complements the vanilla.
- 3 cups confectioners’ sugar: Essential for creating the royal icing for decoration.
- 1 tablespoon meringue powder: Stabilizes the icing, ensuring it holds its shape when piped.
How to Make Graduation Cookies Step by Step
- Preheat your oven to 350°F (175°C). Line a baking sheet with parchment paper.
- In a large bowl, whisk together the all-purpose flour, baking soda, and baking powder. Set aside.
- In a separate bowl, cream the softened butter and white sugar until light and fluffy.
- Add the egg, vanilla extract, and almond extract to the butter mixture, mixing until well combined.
- Gradually add the dry ingredients to the wet ingredients, mixing until just combined.
- Chill the dough in the refrigerator for about 30 minutes for easier handling.
- Roll out the dough on a floured surface and cut into desired shapes using cookie cutters.
- Bake the cookies for 10-12 minutes or until the edges are lightly golden. Let them cool completely.
- Prepare the royal icing by mixing confectioners’ sugar and meringue powder with water until smooth.
- Decorate the cooled cookies with icing and let them dry completely before serving.
Pro Tip: Ensure your butter is at room temperature for easier mixing and a smoother texture.
Expert Tips for Best Results
- Use a kitchen scale for accurate measurements of flour and sugar.
- Chill the dough to prevent spreading during baking for perfectly shaped cookies.
- Invest in good quality food coloring for vibrant icing designs.
- Practice piping techniques on parchment paper before decorating cookies.
- Store decorated cookies in an airtight container to maintain freshness.
- Experiment with different flavor extracts like lemon or coconut for unique cookie flavors.
Variations and Substitutions
- For a gluten-free option, substitute all-purpose flour with a gluten-free flour blend.
- Make it dairy-free by using vegan butter and egg replacer.
- Add chocolate chips for a delightful twist on the classic sugar cookie.
- Incorporate seasonal sprinkles or edible glitter for festive occasions.
How to Serve and Store
Serve these cookies on a decorative platter for a stunning presentation. Pair them with a refreshing beverage like lemonade or iced tea for a delightful treat. Store the cookies in an airtight container at room temperature for up to one week. You can freeze the undecorated cookies for up to three months; simply thaw them at room temperature before decorating. Reheat decorated cookies in the microwave for a few seconds if they become hard.
Frequently Asked Questions
Can I use different flavors for the cookies?
Yes, you can experiment with various flavor extracts such as lemon, almond, or coconut.
How do I prevent the cookies from spreading while baking?
Chill the dough for at least 30 minutes before baking to maintain their shape.
What is the best way to decorate graduation cookies?
Use royal icing for clean lines and vibrant colors; practice piping techniques for better results.
Can I make the dough ahead of time?
Yes, you can prepare the dough and refrigerate it for up to 3 days before baking.
How long can I store decorated cookies?
Decorated cookies can be stored in an airtight container for up to one week.
Is it possible to freeze decorated cookies?
It’s best to freeze undecorated cookies and decorate them once thawed for optimal texture.
In conclusion, mastering the art of graduation cookies is easier than you might think. With scrumptious flavors and beautiful designs, these cookies celebrate your graduate’s achievements while providing a fun baking experience. The top benefits include their customizable nature and the joy of creating something special for your loved ones. Try this recipe today and leave a comment below!
Print
Master the Art of Graduation Cookies for Sweet Success
Description
Celebrate graduation with these delicious and beautifully decorated cookies. Follow these 5 simple steps to create sweet and memorable treats for your graduate’s special day!
Ingredients
- 2 3/4 cups all-purpose flour
- 1 teaspoon baking soda
- 1/2 teaspoon baking powder
- 1 cup unsalted butter, softened
- 1 1/2 cups white sugar
- 1 egg
- 1 teaspoon vanilla extract
- 1/2 teaspoon almond extract
- 3 cups confectioners’ sugar
- 1 tablespoon meringue powder
- Water as needed
- Food coloring (optional)
- Sprinkles and edible decorations (optional)
Instructions
- Preheat your oven to 375°F (190°C). In a small bowl, stir together flour, baking soda, and baking powder. Set aside.
- In a large bowl, cream together the butter and sugar until smooth. Beat in the egg, vanilla extract, and almond extract. Gradually blend in the dry ingredients.
- Roll rounded teaspoonfuls of dough into balls, and place onto ungreased cookie sheets. Flatten each ball slightly with the bottom of a glass, and sprinkle with additional sugar if desired.
- Bake 8 to 10 minutes in the preheated oven, or until golden. Let cool on the baking sheet for a few minutes before transferring to wire racks to cool completely.
- Once cooled, prepare royal icing by mixing confectioners’ sugar, meringue powder, and enough water to reach desired consistency. Decorate cookies with icing and add sprinkles or edible decorations to celebrate the graduation theme.
Notes
- For best results, chill the cookie dough for at least 30 minutes before baking.
- Use a variety of cookie cutters to create graduation-themed shapes like caps, diplomas, and stars.
- Store decorated cookies in an airtight container at room temperature for up to one week.
Keywords: graduation cookies, decorated cookies, royal icing, graduation party treats, cookie recipe