Hey there, fellow food lovers! If you’re on a quest for delicious yet healthy side dishes, let me tell you, healthy russet potato recipes are your new best friend! I mean, who doesn’t love a perfectly baked potato wedge that’s crispy on the outside and fluffy on the inside? It’s like comfort food that’s actually good for you! I remember the first time I made these for a family dinner—everyone was raving about how flavorful they were, and I couldn’t believe how simple the recipe was. Plus, they’re a fantastic way to sneak in some extra veggies without anyone even noticing! So, grab your russet potatoes and let’s dive into this easy recipe that’s sure to become a staple on your table!
Ingredients List
Gather these simple yet flavorful ingredients to whip up the most delightful healthy russet potato side dish:
- 4 medium russet potatoes, washed and peeled
- 2 tablespoons olive oil, for that perfect crisp
- 1 teaspoon salt, to enhance all the flavors
- 1/2 teaspoon black pepper, for a little kick
- 1 teaspoon garlic powder, because garlic makes everything better
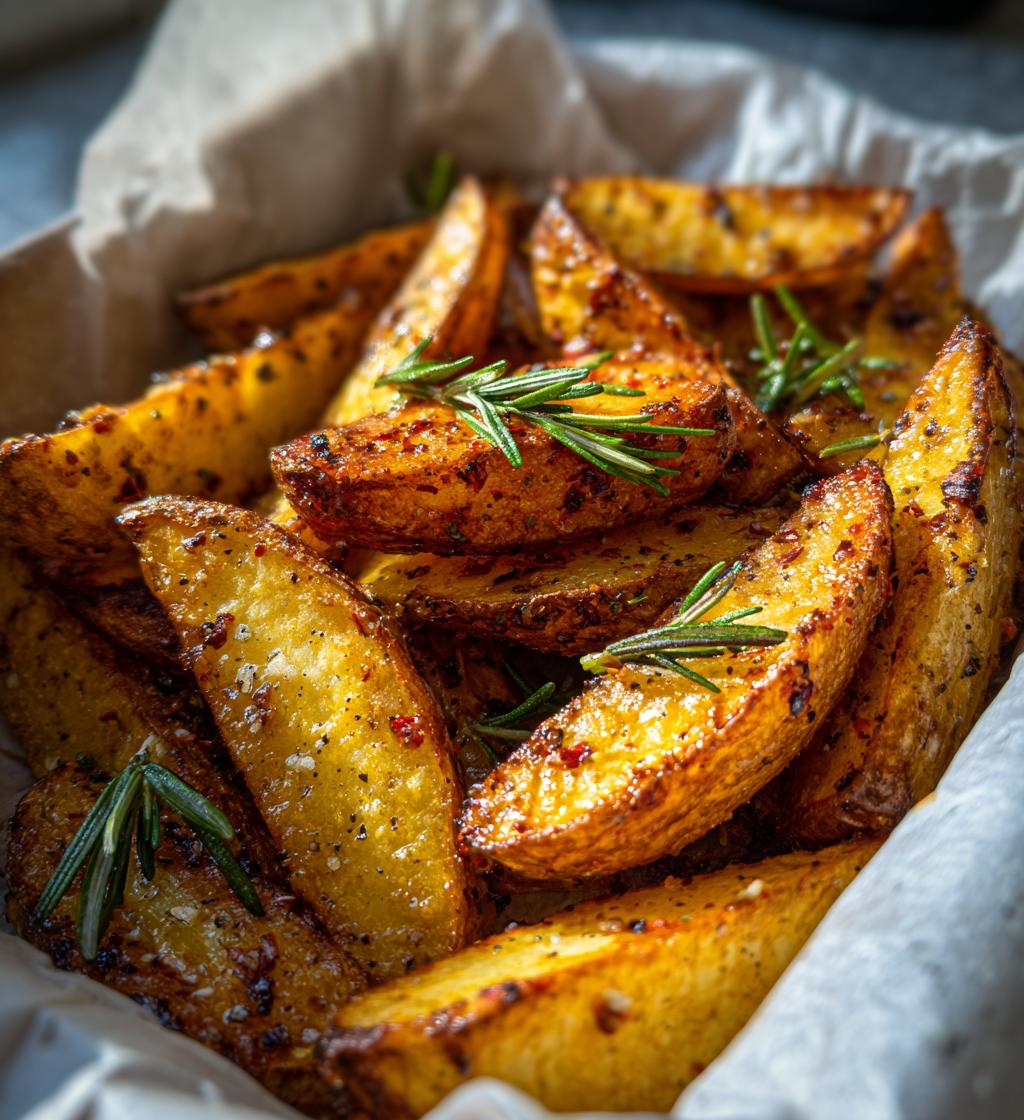
- 1 tablespoon fresh rosemary, chopped, adding a fragrant touch
These ingredients come together beautifully, creating a dish that’s not only tasty but also healthy. Trust me, you’ll love how they transform into golden, crispy wedges!
How to Prepare Healthy Russet Potato Recipes Side Dishes
Now that you have all your ingredients ready, let’s jump into the fun part—making these delicious potato wedges! Follow my step-by-step guide, and you’ll have a fantastic side dish that’s sure to impress!
Preheat the Oven
First things first, you’ll want to preheat your oven to 425°F (220°C). This step is super important because a hot oven helps achieve that perfect golden brown and crispy texture we all crave. Trust me, you don’t want to skip this part!
Prepare the Potatoes
Next, let’s get those russet potatoes ready! Start by giving them a good wash under cold water to remove any dirt. Once they’re clean, peel off the skins. I love the rustic look of skin-on potatoes, but peeling them gives you that smooth texture that’s perfect for these wedges.
Now, cut the potatoes into wedges! I usually aim for about eighths—so each potato gets sliced into eight even pieces. This size is perfect for ensuring they cook evenly and get nice and crispy. Keep those wedges about the same size for even cooking, and you’ll be golden!
Mix the Ingredients
In a mixing bowl, combine your olive oil, salt, black pepper, garlic powder, and chopped rosemary. I like to add the olive oil first, then sprinkle in the salt, pepper, and garlic powder, finishing off with the fresh rosemary. This order helps the dry ingredients blend better into the oil, ensuring everything is well-seasoned. Give it a good stir until it’s all combined!
Coat the Potatoes
Now comes the fun part—coating the potato wedges! Toss those beautiful wedges into your mixing bowl, and use your hands (yes, get in there!) to ensure each piece is evenly coated in that glorious oil and seasoning mixture. This step is key for flavor—every bite should be bursting with those delicious garlic and rosemary notes!
Bake the Potatoes
Spread your coated wedges out on a baking sheet in a single layer. This is crucial—crowding the pan can make them steam rather than bake, and we want them crispy! Pop them in the preheated oven and bake for about 25-30 minutes. Halfway through, I like to flip the wedges to make sure they cook evenly on both sides. You’re looking for that perfect golden brown color and a nice crispiness. When they’re done, they’ll be irresistible!
Nutritional Information
Curious about the numbers behind these delicious healthy russet potato side dishes? Here’s a breakdown of the typical nutritional values per serving. Keep in mind that these are estimates, but they give you a good idea of what you’re enjoying:
- Calories: 150
- Fat: 6g
- Saturated Fat: 1g
- Unsaturated Fat: 5g
- Trans Fat: 0g
- Carbohydrates: 23g
- Fiber: 3g
- Protein: 3g
- Sodium: 300mg
- Sugar: 1g
- Cholesterol: 0mg
These numbers show you can indulge in something tasty without the guilt! So go ahead, enjoy these potato wedges knowing they’re not just a delightful addition to your meal, but also a healthy one!
Tips for Success
Now that you’re ready to whip up these scrumptious healthy russet potato wedges, let me share some of my favorite tips to ensure they’re absolutely perfect every time!
Adjusting Seasoning to Your Taste
Don’t be afraid to make this recipe your own! If you love a little heat, try adding a pinch of cayenne pepper or even some paprika for a smoky kick. Feel free to experiment with different herbs too—thyme or oregano can add a delightful twist. Taste the oil mixture before you toss in the potatoes; if it needs a little more oomph, sprinkle in some extra salt or garlic powder. Remember, this is all about your flavor preferences!
Checking for Doneness
When your baking time is almost up, keep an eye on those wedges! They should be golden brown and crispy on the outside, but the real test is in the texture. Use a fork or tongs to gently poke a wedge—if it feels tender on the inside, you’re in business! If you prefer an extra crisp, pop them back in for a few more minutes, but watch closely so they don’t burn. Trust me, the right balance of crispy and tender is what makes these wedges irresistible!
Using the Right Baking Sheet
Your choice of baking sheet can make a difference too! A heavy-duty baking sheet helps distribute heat evenly and prevents warping, which can lead to uneven cooking. If you have a non-stick sheet, great! If not, don’t forget to line it with parchment paper to prevent sticking and make cleanup a breeze. No one likes a messy kitchen, right?
Make It Ahead of Time
If you’re planning a big meal, you can prep the potato wedges ahead of time. Just cut and season them, then cover and refrigerate until you’re ready to bake. When it’s time, pop them in the oven straight from the fridge—just add a couple of extra minutes to the baking time. This is a fantastic time-saver when you’re juggling multiple dishes!
With these tips, you’re all set to create the perfect healthy russet potato wedges that will impress everyone at the table. Happy cooking!
Variations
One of the best things about these healthy russet potato wedges is how versatile they are! You can easily switch things up to keep your taste buds excited. Here are some fun variations to try:
Herb Infusions
If you’re a fan of fresh herbs, consider swapping out the rosemary for other delicious options! Fresh thyme or parsley can add a light, refreshing twist. I also love using dill for a unique flavor that pairs perfectly with potatoes. Just chop them finely and toss them in with the oil mixture!
Spice It Up
Feeling adventurous? Add some spices for a flavor explosion! Smoked paprika gives a lovely smoky depth, while chili powder or cumin can add a nice warmth. For those who enjoy a little heat, a dash of cayenne pepper or even some red pepper flakes can really kick things up a notch. Just remember to start with a small amount and adjust to your taste!
Cheesy Goodness
If cheese is your weakness (and who can blame you?), sprinkle some grated Parmesan or cheddar right before baking. It’ll melt into a deliciously crispy layer on top of your wedges, creating an irresistible cheesy vibe! Just be careful not to add too much, or it might overshadow the potato’s natural flavor.
Vegan Options
For a vegan twist, you can try tossing the wedges in a mixture of nutritional yeast and olive oil. It adds a cheesy, nutty flavor without any dairy! You can also experiment with a sprinkle of your favorite vegan cheese after they come out of the oven for a delightful finish.
Sweet and Savory
If you’re feeling creative, why not try a sweet and savory combo? Toss in a little cinnamon or nutmeg to your spice mix for a surprising flavor profile. This works beautifully if you want to serve the wedges alongside a roast chicken or in a fall-themed meal. It’s all about balance!
With these variations, you can customize your healthy russet potato wedges to suit any occasion or palate. The sky’s the limit, so don’t hesitate to get a little wild in the kitchen! I can’t wait to hear which combination becomes your new favorite!
Storage & Reheating Instructions
So, you’ve made a big batch of these delicious healthy russet potato wedges, and now you’re wondering what to do with the leftovers? No worries! Storing them properly means you can enjoy that crispy goodness even on another day.
First things first, let the potato wedges cool completely before storing them. This prevents condensation inside the container, which can make them soggy. Once they’re cooled, transfer the wedges to an airtight container. I always make sure to layer a piece of parchment paper between them if I’m stacking them up. This little trick helps maintain their crunch!
When it comes to reheating, I highly recommend using the oven for the best results. Preheat your oven to 400°F (200°C). Spread the leftover wedges on a baking sheet in a single layer—this helps them crisp up nicely. Bake for about 10-15 minutes, or until they’re heated through and regain that glorious crunch. You might want to flip them halfway through for even crispiness, just like when you first baked them!
And there you have it! Following these simple storage and reheating instructions will ensure you can savor those tasty wedges, making them a fantastic side dish anytime you crave them. Enjoy every bite!
FAQ Section
Q1. Can I make these healthy russet potato wedges in an air fryer?
Absolutely! If you prefer an air fryer, just preheat it to 400°F (200°C) and cook the potato wedges in a single layer for about 15-20 minutes. Make sure to shake the basket halfway through for even cooking. They’ll turn out crispy and delicious!
Q2. What other seasonings can I use to enhance the flavor?
There are so many options! Besides garlic powder and rosemary, you can experiment with Italian seasoning, onion powder, or even ranch seasoning for a fun twist. The key is to find a blend that you love!
Q3. How do I ensure my potato wedges are crispy?
The secret to crispy wedges is in the coating and cooking method. Make sure to coat them evenly with olive oil and seasonings, and don’t overcrowd the baking sheet. Space is essential for that golden, crispy texture we all crave!
Q4. Can I use other types of potatoes for this recipe?
While russet potatoes are my favorite for their fluffiness, you can definitely try Yukon Golds or even sweet potatoes if you’re feeling adventurous! Just keep in mind that cooking times may vary slightly depending on the type of potato.
Q5. How long can I store the leftovers, and when should I eat them?
Stored in an airtight container in the fridge, your healthy russet potato wedges will stay fresh for about 3-4 days. They’re best enjoyed within this time frame for optimal flavor and texture, but reheating them properly will make them taste nearly as good as fresh!

Healthy Russet Potato Recipes Side Dishes to Try Today
- Total Time: 40 minutes
- Yield: 4 servings 1x
- Diet: Vegetarian
Description
Healthy russet potato side dish recipes
Ingredients
- 4 medium russet potatoes
- 2 tablespoons olive oil
- 1 teaspoon salt
- 1/2 teaspoon black pepper
- 1 teaspoon garlic powder
- 1 tablespoon fresh rosemary, chopped
Instructions
- Preheat the oven to 425°F (220°C).
- Wash and peel the russet potatoes.
- Cut the potatoes into wedges.
- In a bowl, mix olive oil, salt, pepper, garlic powder, and rosemary.
- Toss the potato wedges in the mixture until evenly coated.
- Spread the wedges on a baking sheet in a single layer.
- Bake for 25-30 minutes until golden brown and crispy.
- Serve hot as a side dish.
Notes
- Store leftovers in an airtight container in the fridge.
- Reheat in the oven for best texture.
- Prep Time: 10 minutes
- Cook Time: 30 minutes
- Category: Side Dish
- Method: Baking
- Cuisine: American
Nutrition
- Serving Size: 1 serving
- Calories: 150
- Sugar: 1g
- Sodium: 300mg
- Fat: 6g
- Saturated Fat: 1g
- Unsaturated Fat: 5g
- Trans Fat: 0g
- Carbohydrates: 23g
- Fiber: 3g
- Protein: 3g
- Cholesterol: 0mg
Keywords: healthy russet potato recipes side dishes