Ah, easy desserts! They’re like a warm hug at the end of a long day, aren’t they? I can’t tell you how many times I’ve whipped up a simple dessert to share with friends and family, turning an ordinary evening into a mini celebration. There’s something magical about transforming just a few basic ingredients into something delicious without spending hours in the kitchen. My favorite memory? It has to be those rainy Sundays when I’d bake something sweet with my mom. We’d giggle and chat while the smell of buttery goodness filled the air. I still crave that cozy feeling! So, if you’re ready to dive into the world of easy desserts, trust me, you’re in for a treat! This collection is all about simplicity and scrumptiousness, perfect for anyone who loves a little sweetness without the fuss.
Ah, easy desserts! They’re like a warm hug at the end of a long day, aren’t they? I can’t tell you how many times I’ve whipped up a simple dessert to share with friends and family, turning an ordinary evening into a mini celebration. There’s something magical about transforming just a few basic ingredients into something delicious without spending hours in the kitchen. My favorite memory? It has to be those rainy Sundays when I’d bake something sweet with my mom. We’d giggle and chat while the smell of buttery goodness filled the air. I still crave that cozy feeling! So, if you’re ready to dive into the world of easy desserts, trust me, you’re in for a treat! This collection is all about simplicity and scrumptiousness, perfect for anyone who loves a little sweetness without the fuss.
Ingredients List
Here’s what you’ll need to whip up these delightful easy desserts. Each ingredient plays a vital role in creating that perfect sweet treat, so let’s make sure we’ve got everything ready!
- 1 cup all-purpose flour – make sure it’s spooned and leveled for accuracy.
- 1/2 cup sugar – granulated, for that sweet touch!
- 1/2 cup butter, softened – this helps create that rich, creamy texture.
- 2 large eggs – they should be at room temperature for the best mixing.
- 1 tsp vanilla extract – pure is best for that lovely flavor.
- 1 tsp baking powder – don’t skip this; it’s key for the fluffiness!
- 1/4 tsp salt – just a pinch to balance the sweetness.
With these simple ingredients, you’re already halfway to a delicious dessert! Feel free to gather them up, and let’s get started on creating something truly scrumptious!
How to Prepare Easy Desserts
Now, let’s dive into the fun part—making these easy desserts! I promise you, it’s as simple as can be. Just follow these steps, and you’ll have a tasty treat ready in no time!
Preheat the Oven
First things first, you’ll want to preheat your oven to 350°F (175°C). This step is super important because it ensures that your desserts bake evenly and turn out just right. So go ahead and set that temperature while you get everything else ready!
Cream Butter and Sugar
Next, grab a mixing bowl and combine your softened butter and sugar. You want to cream them together until the mixture becomes light and fluffy—think whipped butter! This usually takes about 2-3 minutes with a hand mixer or a good old-fashioned wooden spoon. Trust me, this step is crucial for creating that delightful texture in your easy desserts!
Incorporate Eggs and Vanilla
Now it’s time to add in the eggs and vanilla extract. Make sure to beat them in one at a time, mixing thoroughly after each addition. You’re looking for a smooth, well-combined mixture that looks creamy and slightly thicker. This helps add moisture and richness to your dessert!
Combine Dry Ingredients
In a separate bowl, you’ll want to mix together your flour, baking powder, and salt. Whisking these dry ingredients together ensures that everything is evenly distributed. The baking powder is what will give your dessert that lovely lift, so don’t skip this step!
Mix Wet and Dry Ingredients
Now, it’s time to combine everything! Gradually add your dry mixture to the wet ingredients while gently folding it in. I like to do this in three parts—starting and ending with the dry ingredients. You want to mix until just combined; it’s okay if there are a few flour streaks left. Overmixing can lead to a dense texture, and we want these easy desserts light and fluffy!
Bake the Easy Desserts
Pour your batter into a greased baking dish and pop it in the oven. Bake for about 25-30 minutes, or until the top is golden brown and a toothpick inserted in the center comes out clean. The aroma wafting through your kitchen will be heavenly, I promise!
Cooling and Serving
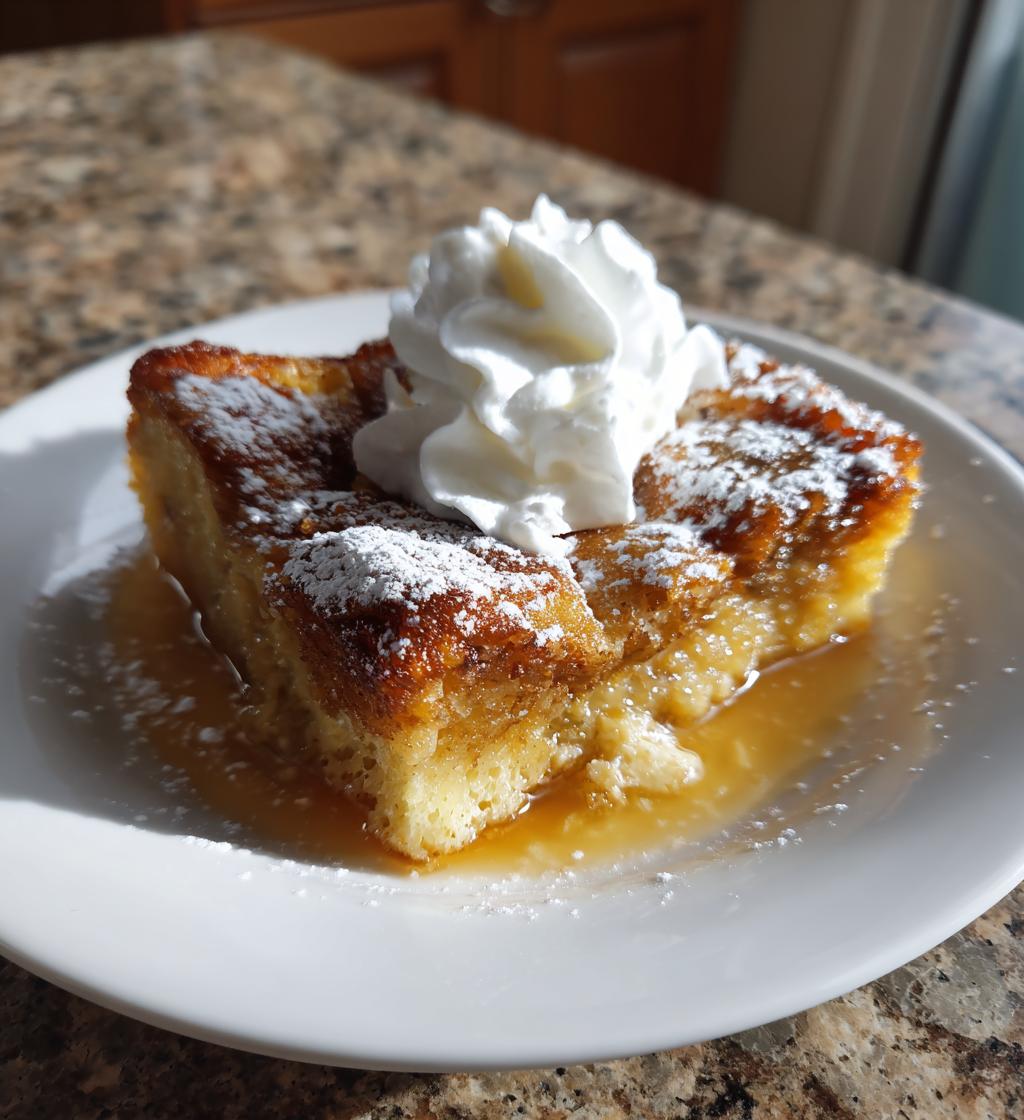
Once your desserts are done baking, let them cool in the pan for about 10 minutes before transferring them to a wire rack. Cooling is important because it allows the flavors to settle and the texture to firm up a bit. You can serve them warm or at room temperature, and don’t forget—top them with whipped cream or fresh fruit for an extra special touch!
Tips for Success
Let’s make sure your easy desserts turn out absolutely perfect! Here are some practical tips that have helped me avoid common baking pitfalls. Trust me, these little insights can make a big difference!
Measure Accurately
Precision is key when it comes to baking. Use dry measuring cups for flour and sugar, and make sure to spoon and level the flour for accuracy. It might seem minor, but too much flour can lead to a dry dessert. So, take your time with this step!
Room Temperature Ingredients
Always use room temperature eggs and butter. It really helps with the mixing process and ensures a smooth batter. If you forget to take them out ahead of time, you can warm the eggs in a bowl of warm water for about 10 minutes and soften the butter in the microwave for just a few seconds—be careful not to melt it!
Don’t Overmix
When you combine the wet and dry ingredients, remember to mix until just combined. Overmixing can develop gluten, making your dessert dense instead of light and fluffy. A few flour streaks are perfectly fine—embrace those little imperfections!
Keep an Eye on the Oven
Oven temperatures can vary, so it’s smart to check your desserts a few minutes before the recommended baking time. You want that golden brown color and a toothpick to come out clean. If it’s not quite there yet, pop it back in for a couple more minutes, but don’t walk away—things can change quickly in the oven!
Let Them Cool
Cooling is crucial! If you cut into your desserts too early, they might fall apart and lose that lovely texture we worked so hard for. Give them a good 10 minutes in the pan, then transfer them to a wire rack to cool completely. This step is worth the wait!
With these tips in your back pocket, you’re all set to create some delightful easy desserts that will impress everyone around you. Happy baking!
Nutritional Information
Now, let’s talk about the nutritional aspects of these easy desserts! Keep in mind that nutrition can vary based on the specific ingredients and brands you choose, so consider this as a general guideline rather than a precise measurement. Here’s a breakdown per serving:
- Calories: 180
- Sugar: 12g
- Sodium: 150mg
- Fat: 8g
- Saturated Fat: 5g
- Unsaturated Fat: 3g
- Trans Fat: 0g
- Carbohydrates: 23g
- Fiber: 1g
- Protein: 2g
- Cholesterol: 40mg
Remember, if you decide to make substitutions—like using gluten-free flour or a sugar alternative—these numbers will change. So, always keep an eye on the labels and enjoy your delicious creations without worry!
Why You’ll Love This Recipe
- Incredibly Easy: This recipe is straightforward, making it perfect for bakers of all levels. You don’t need to be a pro to whip up something delicious!
- Quick Prep Time: With only 15 minutes of prep, you can have a delightful dessert ready in no time. Perfect for those last-minute cravings!
- Delicious Results: The combination of simple ingredients creates a tasty treat that everyone will love. Trust me, your family and friends will be asking for seconds!
- Versatile: You can easily customize this recipe by adding your favorite flavors or toppings—think chocolate chips, nuts, or fresh fruit!
- Perfect for Any Occasion: Whether it’s a cozy night in or a gathering with friends, these easy desserts fit right in. They’re a crowd-pleaser every time!
FAQ Section
Got questions about easy desserts? Don’t worry, I’ve got you covered! Here are some common questions I often hear, along with answers to help you on your baking journey.
Can I make these easy desserts ahead of time?
Absolutely! These easy desserts can be made a day in advance. Just let them cool completely, then store them in an airtight container at room temperature. They’ll still taste delicious the next day!
What if I don’t have all-purpose flour?
No problem! You can use a gluten-free flour blend to make these easy desserts if you’re looking for a gluten-free option. Just make sure it’s a 1:1 substitute, and you should be good to go!
Can I add mix-ins to the batter?
Definitely! Feel free to get creative. Chocolate chips, nuts, or dried fruits work great in this recipe. Just fold them in gently after mixing the wet and dry ingredients so they’re evenly distributed throughout the batter.
How do I know when my easy desserts are done baking?
Great question! The best way to check is by inserting a toothpick into the center of the dessert. If it comes out clean or with a few moist crumbs, it’s done. You should also look for a golden-brown top and a slight spring back when you gently press the surface.
Can I freeze these easy desserts?
Yes! You can freeze these desserts for up to three months. Just wrap them tightly in plastic wrap and then in aluminum foil, or store them in a freezer-safe container. When you’re ready to enjoy, let them thaw in the fridge overnight or at room temperature for a few hours.
Storage & Reheating Instructions
Now that you’ve made these delightful easy desserts, let’s talk about how to store any leftovers—if there are any! You’ll want to keep them fresh for as long as possible, so here are my go-to tips.
First, make sure your desserts have cooled completely before storing. This helps prevent any moisture from building up inside the container, which can lead to sogginess. I recommend using an airtight container to keep them fresh and delicious. Just pop them in, seal it up, and they’ll be good at room temperature for about 2-3 days.
If you want to keep them longer, you can freeze your easy desserts! Wrap each piece tightly in plastic wrap and then place them in a freezer-safe bag or container. They’ll stay fresh for up to three months. When you’re ready to enjoy, just let them thaw in the fridge overnight or at room temperature for a few hours. Trust me, they’ll taste just as good as the day you made them!
For reheating, if you like your desserts warm (and who doesn’t?), pop them in the microwave for about 10-15 seconds, or until warmed through. Just be careful not to overdo it, or they might get a little tough. Alternatively, you can reheat them in a preheated oven at 350°F (175°C) for about 5-10 minutes. This will help keep that lovely texture intact!
With these storage and reheating tips, you’ll be able to savor your easy desserts even after they’re baked. Enjoy every last bite!
Print
easy desserts: 7 Simple Recipes for Sweet Comfort
- Total Time: 45 minutes
- Yield: 8 servings 1x
- Diet: Vegetarian
Description
A collection of simple dessert recipes that anyone can make.
Ingredients
- 1 cup all-purpose flour
- 1/2 cup sugar
- 1/2 cup butter, softened
- 2 eggs
- 1 tsp vanilla extract
- 1 tsp baking powder
- 1/4 tsp salt
Instructions
- Preheat the oven to 350°F (175°C).
- In a bowl, cream together the butter and sugar.
- Add the eggs and vanilla, and beat well.
- In another bowl, mix flour, baking powder, and salt.
- Gradually add the dry ingredients to the wet ingredients.
- Pour the batter into a greased baking dish.
- Bake for 25-30 minutes or until golden brown.
- Let cool before serving.
Notes
- Serve with whipped cream or fruit topping.
- Store leftovers in an airtight container.
- Can be made gluten-free by using a gluten-free flour blend.
- Prep Time: 15 minutes
- Cook Time: 30 minutes
- Category: Dessert
- Method: Baking
- Cuisine: American
Nutrition
- Serving Size: 1 piece
- Calories: 180
- Sugar: 12g
- Sodium: 150mg
- Fat: 8g
- Saturated Fat: 5g
- Unsaturated Fat: 3g
- Trans Fat: 0g
- Carbohydrates: 23g
- Fiber: 1g
- Protein: 2g
- Cholesterol: 40mg
Keywords: easy desserts